Tag Archives: food

Valentine’s Day Dinner Ideas

We’ve been snowed in for the past couple days and things are getting pretty weird around here. Last night we screamed at each other just to scream. Not fighting, just yelling. My butt hurts from laying in bed for a prolonged period and I’m afraid we’ll run out of wine soon. It’s not the most romantic of Valentine’s Days, for sure. But tonight I’m planning on making dinner and maybe tomorrow we’ll get to venture out into the snowpocolypse for more romantic sustenance. Or at least sustenance that requires changing out of pajamas.

Here’s some ideas for tonight’s meal:

Baked Brie with raspberry jelly and walnutsThis baked brie with raspberry sauce would be a great way to start your meal.

Pork Chops I don’t think it gets more romantic than bacon. Who’s with me? Check out the recipe for these bacon-wrapped pork chops.

Pizza with an egg on top!

Pizza is my favorite Friday night meal. It’s quick, easy and cheesy. Doesn’t get much better than that. Click here to learn more about my favorite way to serve pizza.

pudding2This rice pudding is a great way to end a meal. I affectionately refer to it as love puddin’.

how to make snow creamAnd since we’re snowed in, it’s only appropriate to serve snow cream! Learn more about snow cream here.

Are you cooking at home for Valentine’s Day? Let me know in the comments!

love and happy Valentine’s!
melanie


Super-Easy Snow Cream

snow cream recipe  I was told from some old country folk that I couldn’t eat snow cream from the first snow of the season or from yellow snow (ha!), but the second snow was fair game. Yellow snow is never fair game. This week we had the second snow! Since I had never tried it, ya’ll know good and well that I was determined to make some snow cream.

how to make snow creamThere are a million different variations of snow cream. I stuck with the easiest I found and the one with the ingredients I had on hand. There is no way I’m driving in the snow to the store for extra ingredients.

Here’s how I made super-easy snow cream:

Ingredients:

  • One gallon of fresh snow
  • 1 cup of sugar
  • 2 cups of milk
  • 3 tablespoons of vanilla (I like mine very vanilla.)

When it begins to snow, set out a gallon bucket. When the bucket is full bring it inside, add the sugar, milk and vanilla. I mixed mine with a stand mixer and it was so much easier to bring the ingredients together. That’s all there is to it!

a close up of snow creamNote: I want you all to know that yes, I considered the implications of using real snow that fell from the sky. I know all about acid rain and chemicals and in no way am I claiming that this snow cream is organic or good for you or even safe. I’m not feeding this to children or anyone against their will. We all know what’s in snow cream and that’s that. Eat at your own risk.

Have you ever had snow cream? I want to hear about it in the comments!

love and snow!
melanie

Nuts About You: Valentine’s Day Recipe and Free Printable

Nuts about you

I secretly love Valentine’s Day. I know it’s not cool to like the lovey-dovey holiday, but George and I had our first date on Valentine’s Day and I can’t help but be nostalgic about it. This year instead of the heart-shaped cookies, candy and cakes, I wanted to do something a bit different.  Who comes to the rescue once again? Our beloved friend, nuts!

Ingredients:

  • 1 tbsp coconut oil
  • 1/2 cup of walnuts
  • 1/2 cup of pecans
  • 1/2 cup of cashews
  • 1/2 cup of dark chocolate chips
  • Sea salt for sprinkling

Melt the coconut oil in a skillet over low heat. Throw in the nuts and toast until slightly brown. Remove from heat and spread nuts on a cookie sheet lined in wax paper. Melt chocolate in a double boiler or impromptu double boiler (a larger pot over a slightly smaller pot 1/4 full of water.) Stir chocolate constantly and when smooth drizzle over nuts. Sprinkle with sea salt. Chill nuts in fridge until chocolate sets.

Chocolate covered nuts

To make the bags, I took a Ziplock bag and cut off the resealable edge. Then, I added the nuts. To make the printable, I drew a little peanut cartoon (then George told me it sucked and re-drew it) and scanned it in Photoshop. But you don’t have to do that because I created a downloadable one for you right here! Just click on it for the full image!

Nuts about you printable

Finally, I cut out the image, punched a hole and tied it to the bag. Easy peasy, lemon squeezy. Make them for anyone and everyone you are nuts about!

love,
melanie


Bacon-Wrapped Pork Chops

Pork Chops I’m a grown woman and I have irrational fears of the broiler. It’s going to set the house on fire! It gets too hot! If a recipe calls for using the broiler, I won’t use it. I never said I was brave, people. But this weekend I conquered my fear of the boiler and somehow managed to not set the trailer ablaze.

Bacon-wrapped anything is a good idea, but bacon-wrapped pork chops were extra delightful. It’s pork wrapped in pork. You can’t get much better than that. By baking these chops, I was able to avoid the dried out quality of pan fried pork chops. And I stuck it to the broiler.

Bacon Wrapped Pork ChopsIngredients
Bacon (pieces depend on the size of ya chops!)
Pork chops
Salt and pepper

Pre-heat oven to 400 degrees. Wrap bacon around pork chops. Cook in the oven for 30 minutes. Then crank up that broiler and broil those babies for 5 minutes or until bacon is crispy.

That’s bringing home the bacon if I’ve ever seen it. What are your irrational kitchen fears? Let me know in the comments!

love,
melanie

8 Ways to Save Money by Reusing Leftovers

leftoversYou probably already know that leftovers can be a big money saver. Duh, they all say. But let’s be real, leftovers get old quick. Pun intended. I do pretty good at eating leftovers, but after a couple of days I’m sick of eating the same thing. So what’s a girl to do? Repurpose and upcycle those leftovers, that’s what!

Here’s some of my favorite ways to repurpose leftovers:

1. Make chili even heartier with spaghetti noodles!
Chili can last a long time– especially if you make a big ol’ pot. When I was little we never ate chili alone. We always ate it over spaghetti noodles. It makes the chili heartier, last longer and stretch further. When we were grown, my mom told me this was a “poor person thing” but until I moved out of the house I had no idea that people ate chili without spaghetti noodles!

2. Put an egg on it!
One of my favorite ways to spice up leftovers is to throw in a fried egg. Eggs are super cheap and I seem to always have extra in the fridge. Protein power! My absolute favorite is a breakfast pizza. Throw a raw egg on top of your leftover pizza and heat in the oven until the egg white is well… white. So delicious!

3. Don’t throw that last bit away!
Sometimes it’s tempting to throw that last tiny bit of chicken or sauce away. It’s not enough for a whole meal, right? But before you toss it, think about ways you can pump it up. Adding more sauce or more vegetables can beef up that last little bit of food into a whole meal.

4. Smorgasbord!
As you might have noticed, when I was growing up, we didn’t have a lot of money. It didn’t bother me much because my mom had a great imagination and encouraged us to have one too. She used to tell me that the local grocery store during the fall was a pumpkin patch. I didn’t find that out until last year. Man, was she clever. At the end of each week, she’d break out all the leftovers and we’d have a little dab of everything. We got to pretend we were kings eating at our very own smorgasbord.

5. Experiment
It’s so easy to get in a cooking rut. Eating the same 5 meals is easy. But challenge yourself to experiment. Get creative with your cooking. Try to eat all of the stuff in your pantry and fridge before you go shopping. See what you can come up with. Don’t feel very creative? Websites like Recipe Key can help you to find recipes using just the ingredients you have in your pantry.

6. Remember, you don’t always have to use leftovers right away.
Certain foods lend well to freezing. Chili for example. You don’t have to eat chili for the next two weeks (because you’re eating is with spaghetti noodles, right?). You can freeze half of it and break it out during an extra busy or extra chilly weeknight.

7. Leftovers can be made into totally different meals
One of the worst things about leftovers is that they can be boring. But they don’t have to be because they can be made into totally different meals. I used to hope, hope, hope that we had leftover rice at our meals to make rice pudding. My mom’s recipe for rice pudding is the best. Stale bread can be made into french toast, leftover veggies can be made into quiche and leftover spaghetti sauce can be used as pizza sauce! The possibilities are endless, people.

8. Use it as compost
Don’t feel guilty when that leftover tortellini looks like a science experiment gone awry. You can’t eat it now. (Well you could, but you could also end up in the hospital.) But you can still compost it! Throw it in the compost heap and use it to get that garden good and fertile! Helpful hint: Used coffee grounds make excellent plant fertilizer!

Do you have any tips for upcycling leftovers? I’d love to hear them in the comments!

love,
melanie


Austin: Part I (The Food!)

Austin, Texas

For our Christmas presents/1 year anniversary/ New Year’s eve, George and I visited Austin, Texas! It was such a relaxing trip. We had no plans– which is my favorite way to travel. It’s funny because in “real life” I thrive on plans, but when I’m on vacation I don’t plan a thing.

korean food

I didn’t expect it, but my favorite part of Austin was the food! Amazing food is everywhere. There is such a variety, which I totally didn’t expect. I thought I was going to be eating Tex Mex all day everyday. And I would have been totally ok with that. The Korean food pictured above cured my jet lag.

Hut's hamburgersThese hamburgers from Hut’s Hamburgers were (dare I say) the best I’ve ever had. They even had gluten-free buns!

mexican foodThe food trucks and outdoor dining were in abundance. I’d love to go back when the temperature is a little warmer!

Austin food trucksThis cutie was in food heaven.

Stay tuned for Part II!

Did you all travel over the holiday? Have you ever been to Austin? Let me know in the comments!

love,
melanie


Handmade Holiday Challenge: Infused Liquors!

infused liquorsI’ve never been too keen on flavored liquors with the exception of my college Smirnoff Lemon Vodka phase. I feel a little barfy just thinking about it. But that’s because most of those liquors are artificially flavored. I mean Cinnabon-flavored vodka? That can’t be real.

Infusing your own liquor is so much tastier than the manufactured stuff and makes mixed drinks extra special. And infused liquors make a great hostess holiday gift. Good thing my friends like to party because everyone is getting infused liquor this year!

infused liquors closeupHere’s the stupid-easy how-to:
Grab a canning jar. Cut up some fruit, add spices (if you desire) and fill the jar with liquor. I recommend using organic fruit so there’s no yucky stuff infusing the liquor. Then, shake once a day, everyday. The liquor will be infused in about a week!

I’ve tried strawberries and vodka before with great results. The vodka tasted just like real strawberries! This time I’m also trying an apple-infused bourbon and a green apple-infused moonshine. (The moonshine is legal, guys. It’s Junior Johnson’s Midnight Moon, if you are curious.) For the apple-infused liquors, in addition to the fruit, I also added a cinnamon stick and three cloves. I’m thinking with a little bit of simple syrup it will taste like apple pie!

I’m so excited about these holiday gifts, I might have to keep one for myself!

love,
melanie


Crockpot Pumpkin Chili

pumpkin chiliI told ya’ll I was pumpkining all the things. I should just start driving a pumpkin to work, Cinderella style. My rotund orange friend has conveniently snuck in to all sweet and savory dishes that have come out of the Airstream kitchen lately. I’m sorry, husband. He’s such a good sport about it. I think he deserves a pumpkin cupcake.

But that’s not what we’re here to talk about today. Oh no. Today we’re here to talk about creamy, savory, EASY, pumpkin crockpot chili. It’s chilly and it calls for chili.

pumpkin chiliThis pumpkin chili doesn’t taste like a pumpkin pie or anything creepy, like that. The pumpkin just makes the chili thicker and adds a little somethin’ somethin’ to the taste.

Pumpkin Crockpot Chili
Ingredients

  • 1 1b ground beef
  • 1 cup of canned pumpkin (not the pie filling kind!)
  • 1 can of diced tomatoes with chilies (don’t drain!)
  • 2 diced green peppers
  • 1 can of black beans, drained and rinsed
  • 1 can of kidney beans, drained and rinsed
  • 1 can of pinto beans, drained and rinsed
  • 1 tsp garlic powder
  • 1 tsp onion powder (or a small, real onion, if you have it)
  • 1/2 tsp chili powder (or more depending on your spiciness!)
  • 1 tsp paprika
  • 1 tsp crushed red pepper
  • Black pepper to taste

Throw everything in the crock pot. Meat and green peppers on bottom. Stir occasionally. Let it do it’s magic for 6 hours on low. Voila! You’ve got pumpkin crock pot chili. Top with your favorite things: cheese, sour cream and avocado, recommended.

What are your favorite fall recipes? Let me know in the comments!

love,
melanie

Tips and Tricks for Campfire Cooking

Tips for campfire cookingWe’re pretty much cave people now. Livin’ in the woods, not brushing our hair, makin’ jerky. Before we start picking bugs off each other to eat, I thought I’d share tips on my new favorite, cave (wo)man way to cook– AN OPEN FLAME!

The thought of a large open flame near my beautiful home still scares me a bit. I usually make George actually start the fire, but I’m not afraid to saute and grill like I’m Bobby Flay once the flame dies down.

Here’s some of the best tips I’ve learned from our campfire adventures.

1. You don’t have to go camping to cook over a fire. Building a fire in your backyard (if it’s permitted) is even more fun because you don’t have to lug all that stuff around. Plus, if you are cooking something a little stinky, like fish, it doesn’t smell up your house!

2. Build your fire with dry, untreated wood. You’ll never get a fire started with wet wood and you definitely don’t want to build a cooking fire with chemically treated wood. Umm, gross.

3. Learn how to correctly build a fire. We’re partial to the pyramid or tenting method.

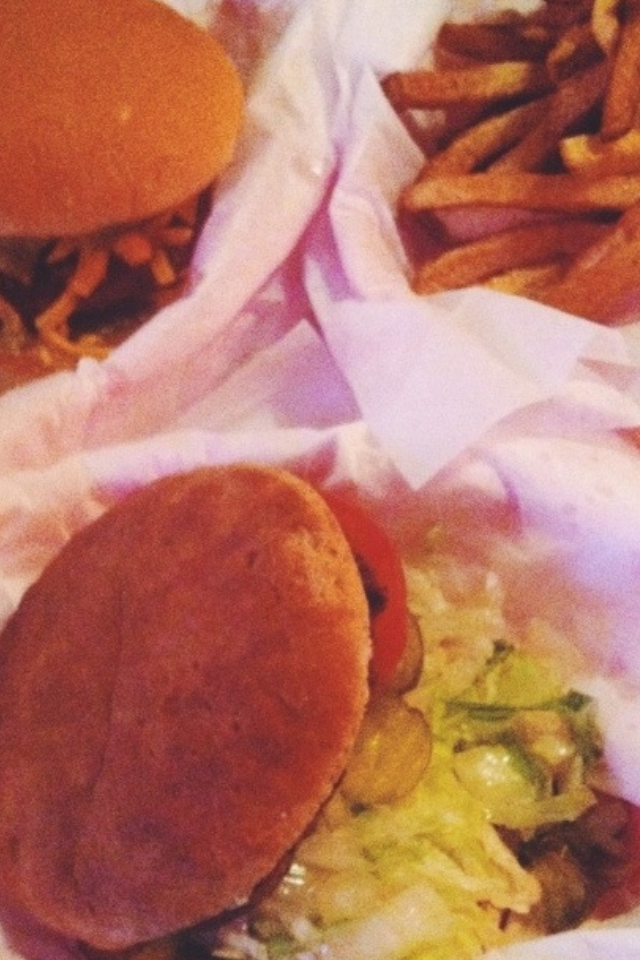
4. Don’t limit yourself! Campfire cooking doesn’t have to be all hotdogs and hamburgers. I’m all for a good greasy burger and some Heb Natties, but campfire cooking can also be adventurous! If you have a cast iron skillet, you can cook almost anything on a fire! Which brings me to the next tip…

5. Have the right equipment. You don’t need a lot of stuff to cook on a fire. Don’t let anyone tell you differently. Cave men cooked with sticks. A lighter, a cast iron skillet and an old oven or grill grate works great. (Get it?!) It’s what we use! You can make almost anything in a cast iron skillet. I should be their spokesperson, I love ’em so much. I’d also recommend a heat-proof oven mit, like the Ove Glove. I thought that thing was an infomercial joke, but, man it works!

6. Remember the oil and spices! Throw some olive oil, salt, pepper, your favorite spice and a potato or protein into a tin foil envelope. And voila! You’ve got a hobo packet. Really, that’s what they’re called and it’s delicious.

Cooking on Campfire Coals

7. Be patient. Don’t try to cook when the flame is still high. Wait until the flame dies down, or wait until there are only coals or wood chips left. You can even cook directly on the coals or wood chips! (See photo above!)

8. Be safe. If you are ready to go to bed or leave the area, be sure to douse your fire with water. Fires can get out of control real quick and “only you can prevent forest fires.”

9. Keep it fun. Campfire cooking is all about fun. It always requires marshmallows and maybe a few beers.

Have you been campfire cooking? Got any tips? Let me know in the comments.

love,
melanie


Try a Green Slimer Smoothie for a Healthier Halloween!

slimerI’ve reached a new level of crazy. I’m blending up smoothies and Photoshopping Slimer into them. If you are not familiar with my green friend, Slimer is a ghost made up of Ectoplasm. He successfully made his debut in the 1984 Ghostbusters film.

But I must give credit where credit is due. George was the one who said my smoothie looked like Slimer. And I must admit, I was totally offended. I don’t want to hear that my food looks like a disgusting, fictional ghost that leaves a trail of boogers behind him wherever he goes. But George was more excited about the smoothie than any grown man should be. And if he is excited to drink veggies, I know a kid would be. 

And, I mean, what a better way to get a kid to eat drink their greens than tell them it is slime?! And it’s pretty much perfect for Halloween, right?! AND IT GETS BETTER… BUT DON’T TELL THE KIDS… it has no refined sugar! WHA-BAM! I’ve lost it.

Slimer Green Smoothie:

Ingredients
1 frozen banana
1/2 cup of pineapple
2 large hand fulls of spinach
1/4 cup of greek yogurt
1/4 cup of almond milk

Put ingredients in your favorite blender and blend that sucker up! Tell your kids husband it is Slimer. He’s going to be super excited. Use it as an excuse to throw a Halloween party.

What do you think? Have I lost my mind or will you be blending along with me?!

love,
melanie